Filters are used to process and filter data, stored on the platform, to make it available anywhere via hashtags mechanism. It is a visual way to create SQL requests to data stored on the platform.
There is also an ADVANCED USERS way to create filters dynamically and change data to be pulled on a fly from a UI.
FILTERS' USAGE
Data sets that can be filtered | How to refer to filtered results | Where to reference Filtered data |
|
This is how a set of Filters can look in you app:
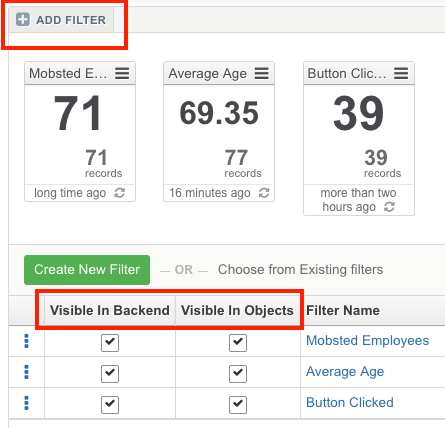
You can create Filters in APP DATA section for both Objects and Events (ORANGE MARK) , Add New Filter (RED MARK).
You can make VISIBLE/INVISIBLE or HIDE/SHOW needed filters in your admin panels ↑
Each Filter shows:
- Aggregate function chosen - SUM, AVG, MIN, MAX, COUNT
- Number of records fitting the conditions
- When it was last time refreshed
Setting up an Events/Objects Filter
Create and Name a new Filter. Naing is very important, as you will refer to it's data using Hashtags:
Set up Events/Objects Filter's Conditions:
Select the value to be compared. Possible options:
Action name of the Event
Key of the Event
Object property, such as: Phone, Email, Login date.
Select the comparison criteria. Possible options:
Equal ( = ) - strict match.
Not equal ( <> )
Contains
Doesn't contain
Is Set - checks if the field specified is NOT empty
Is Not Set - checks if the field specified is empty
Select the comparison value. Possible options:
String from the dropdown
Any text typed in manually
Filters automatically pull data which you have in any of your tables. So, for example, if you have a Column called Email in Objects, then you'd be able to select it for checking.
SO - Make sure all data fields you need in filters are ALREADY CREATED.
EXAMPLE 1: Set up for Object filter that calculates the average age of people with mobsted.com email:
EXAMPLE 2: Set up for Event filter that calculates the number of clicks on the button with the BackendName "updatePhone" within 7 days:
Merge Results of Two Filters
Each Filter can ONLY contain either AND or OR condition. In order to have OR + AND conditions use server side hashtags within new filter.
EXAMPLE: we created the filter that will display everyone with email on Mobsted OR Outlook domain, and who has US phone number.
First filter will contain the required Email condition, we will name it as Email.
2. Second filter will contain the required phone condition merged (AND operator) with the Email filter above.
You need to use this hashtag to render filter's results in server side and pull it into second filter's conditions - #ServerSide:ObjectsFilter:NAME:Data@join(",", "objects@id")#
Where two variable are: NAME - is how you call the FIRST filter, ID is a common field used to "join" the results with.
NOTE - There is also a way to create filters dynamically and change data to be pulled on a fly from a UI that has ability to also combine AND/OR requests for data. It is recommended for advanced Mobsted users only.
USE PERIOD SETTING
Set up a time period the filter will be applied on. Time period can be fixed between dates specified, or dynamic - older than 2 days / younger than 3 weeks. Can be used with OR or AND conditions, but not combined.
PREVIEW YOUR FILTER RESULTS
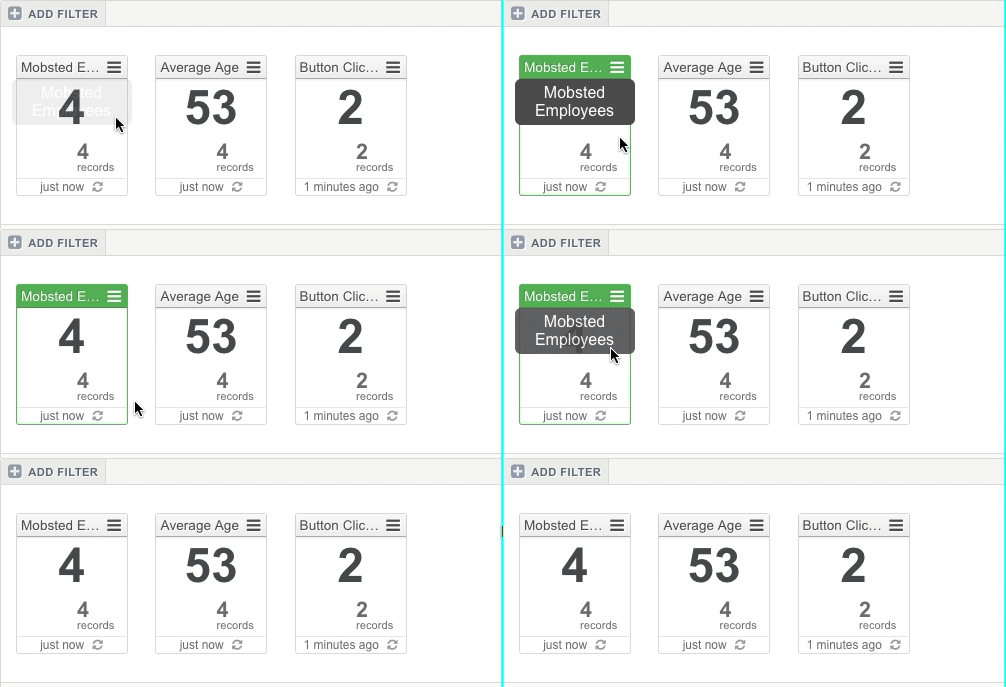
Click on the filter to see all the data applicable to it. To see all the data click again on the filter to unselect it.
Use Filter Results on App Screen
It is possible to display filter results to app user by using Hashtags.
SHOWING SINGLE FILTER RESULT
Showing filter counts: We use Hashtags to refer to Object's Filter "Age" and show the Count of matching records - #ObjectsFilter:Age:Count#
To see how it is set up go to the Demo App in your account, screen name - "Filters Count".
SHOWING AN ARRAY OF FILTER RESULTS
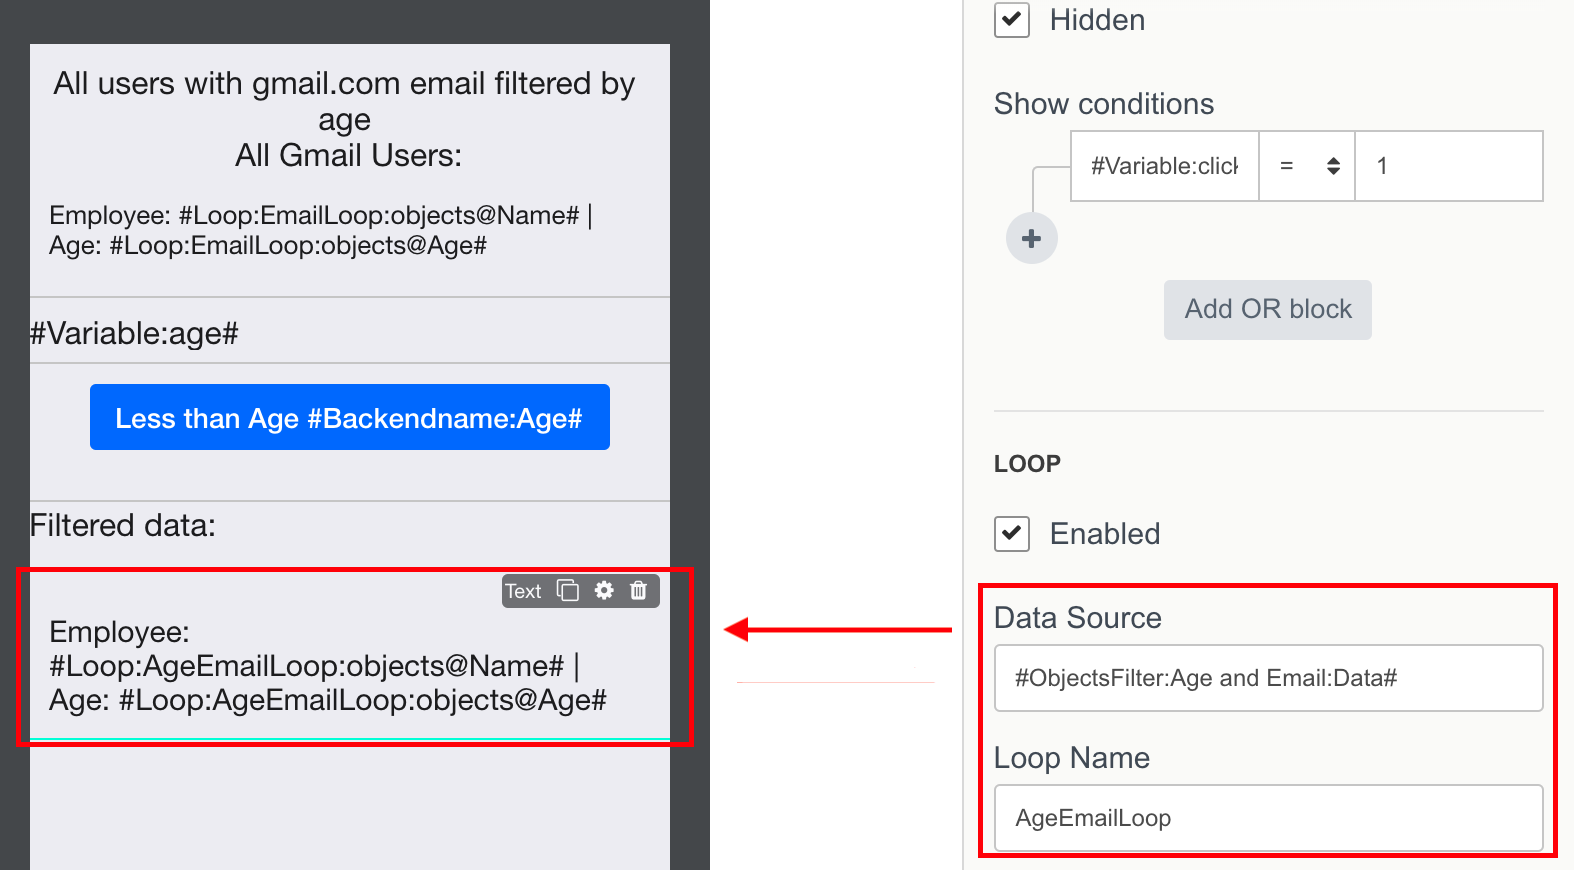
Iterating through filter records: We use Hashtags functionality combined with loops to go through each record. How to set it up:
Enable loop on the element you want to iterate
Use your filter data as data source. In our case it is #ObjectsFilter:AgeEmail:Data#
Name the loop. In our case it is AgeEmailLoop
Reference the loop and call the properties of the Object that you want to display, in our case it is Name ( #Loop:AgeEmailLoop:objects@Name# ) and Age ( #Loop:AgeEmailLoop:objects@Age#).
AND Resulting view in app:
To see how it is set up go to the Demo App in your account, screen name - "Filters Iterate". Also Refer to Loops article on details of looping arrays of data.
Filtering Lists of Data Tables
This functionality is not yet visually shown (like in Objects/Events. However it is 100% up and running on a backend of Mobsted. Write to [email protected] and we will create any number of Filters needed for you - it is free of charge.


