...
| Note |
|---|
Before proceeding, make sure you know, how basic adding elements in Constructor works, PLUS:
|
...
| Info | ||
|---|---|---|
| ||
#Loop:LOOPNAME:objects@COLUMN-NAME#
Other properties that can be referenced are: |
...
16. Click Preview button to launch app from the screen to check it works.

| Infonote |
|---|
You can have a look at how it's setup in Demo App in your account, screen - Filters Iterate. |
You can have a look at how it's setup in Demo App in your account, screen - Filters Iterate. |
DATA FROM OPERATIONS
We have a screen, where a user can select a country from the drop down and see its' public holidays. For this example, we have pre-created API Operation to the 3rd party service.
...
Drag and Drop a Select element
Use Add Option and create a list of countries:
Label = USA Value = US
Label = Canada Value = CA
Label = Brazil Value = BR
Drag and Drop Button element
Set it's properties:
Backendname = holidaysButton
Caption Button = Check Holidays
Click Actions, select Execute Operations and add pre-created Holiday operation
Drag and Drop Text element
Enable looping for that element: find LOOP in the right hand side menu and check Enabled box

Set up Data Source for the loop: #Operation:Holiday:Response:Result:0:response:holidays#
Name the loop as Holidays
Go to Text field of the element and set up what will be displayed by pulling the required array elements from the loop (OPERATION):
#Loop:Holidays:name#
#Loop:Holidays:date:iso#
...
You can take a look at how it's implemented in Demo App in your account, screen - 13 Operation Loop Screen.
| Infonote |
|---|
You can take a look at how it's actually implemented in Demo App in your account, screen - Operation Loop Screen. |
DATA FROM LISTS OF TABLES
You can loop any data from any of your custom Lists of Tables. Pulling data arrays from lists of tables is available anywhere, where there is a Loop, including on slider components, etc etc.
For example, using existing tables in you Task Manager sample app, we can do this to show all languages available for it's users, which are stored in table named "languagelist" and in column named "language"
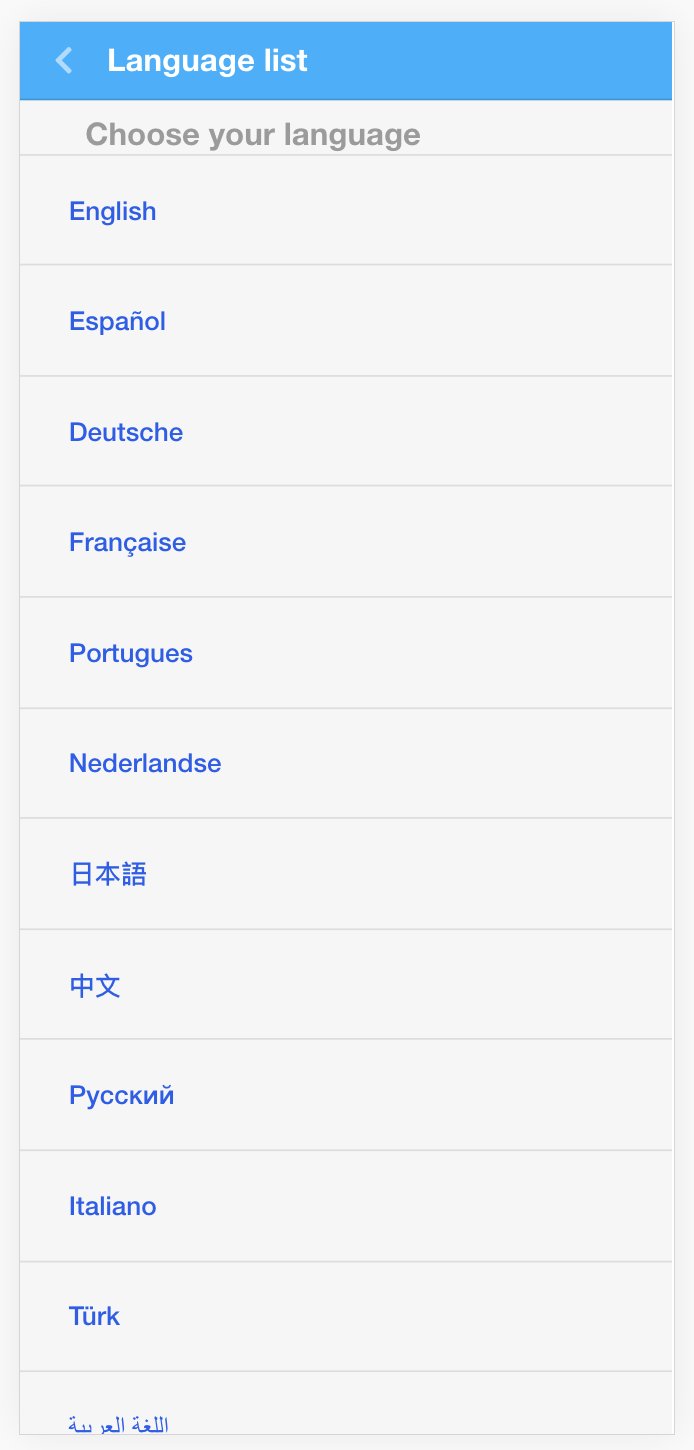
Steps taken in this example:
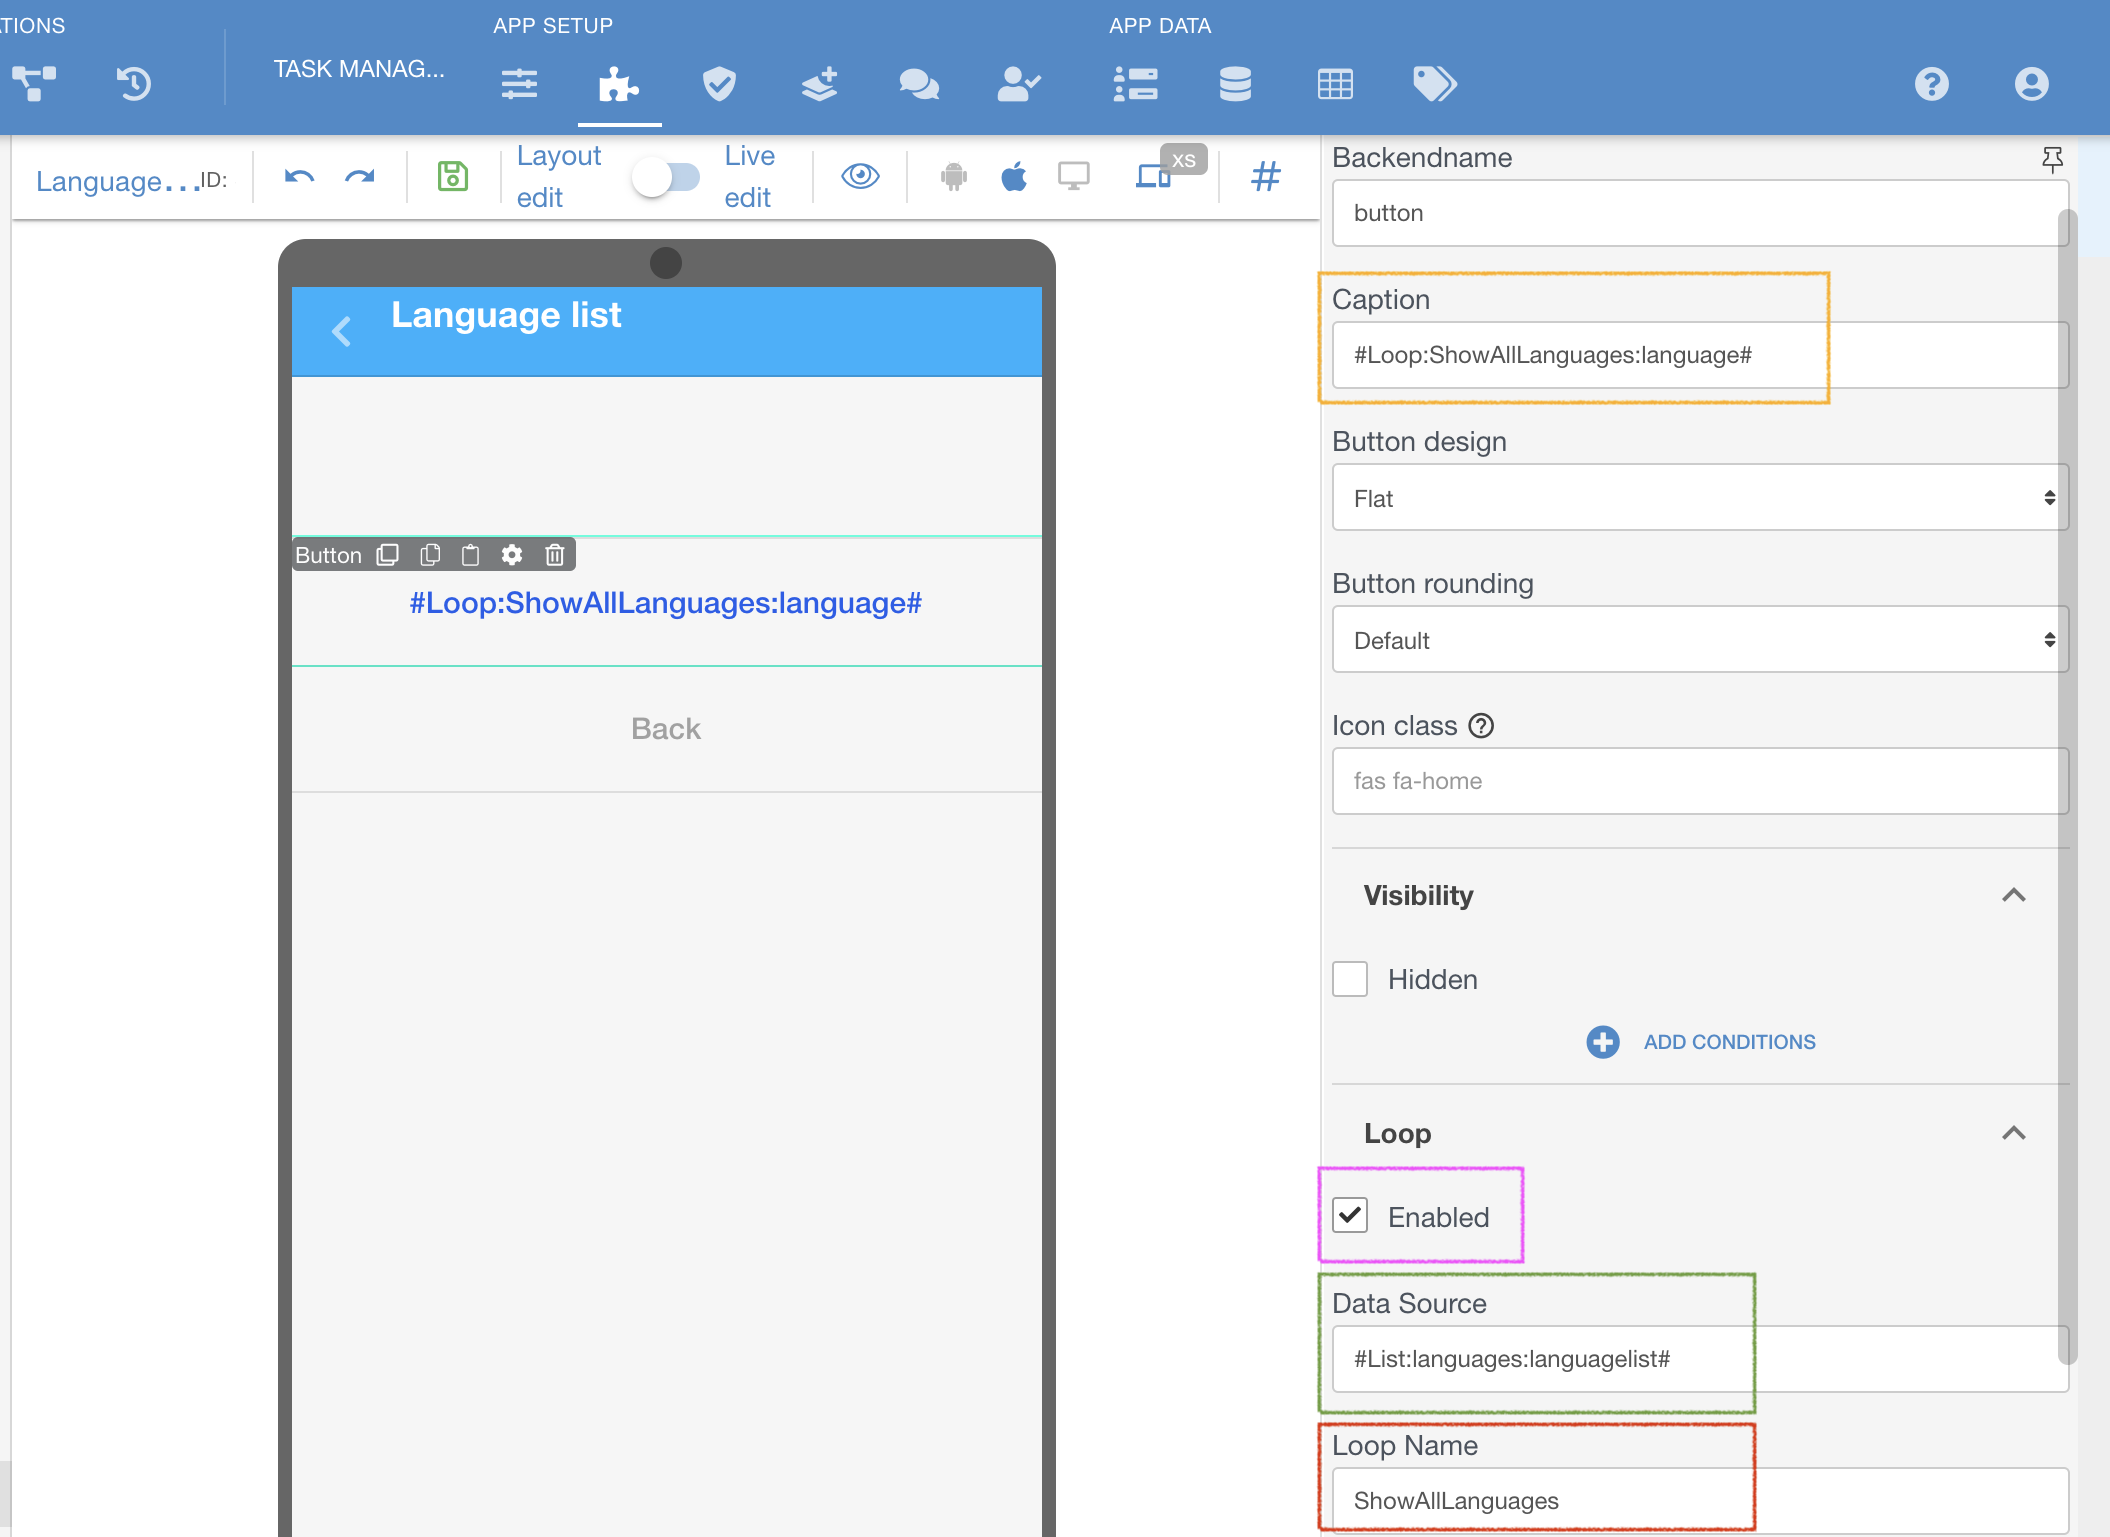
A button added to a screen
Enable Loop on the button, marked purple ↓
Insert a hashtag with the List you want to use as Data Source, marked green ↓, as example, #List:languages:languagelist#, where:
List = a command to address lists of tables in hashtag
languages = a name of a list we have in this sample app
languagelist = a name of the actual table you are referring to
Name the Loop, as how it can be referred later on, marked red ↓, for example - ShowAllLanguages
Refer to this named Loop in any place of a button, in this case in Caption section - #Loop:ShowAllLanguages:language# , where:
Loop = a command to show that some data needs to be pulled from the Loop
ShowAllLangues = a name of the loop we have given before
language = an exact column name, which you are pulling from the list and need to iterate.
| Note |
|---|
There is a reason why there is an extra step, from DECLARING the Loop's source and using it's data on screen in form of a Loop's name. This allows to declare and name more then one data source for the same iteration (inserting row in row and declaring loop on each of them) and refer to the exact needed data point later to show more complex data. |
| Content by Label | ||||||||||||||||||
|---|---|---|---|---|---|---|---|---|---|---|---|---|---|---|---|---|---|---|
|
...