Deploy Types & Approaches
There are three main options to amend applications:
1) Instant Manual
Every time you press the "Save" button in Constructor, all changes become instantly live for all users of your app. When some minor changes are needed, like changes in a text this is the best way to go. Just change and save.

2) Links Rewire
When more changes are required on a single screen in an app with relatively few screens, like 3-5, developers can duplicate a needed screen, within the same app, then do and test all the changes on it and then reconnect that screen instead of the old one, by changing "Got to" actions on all other screens.

3) Replace Screens - RECOMMENDED
For larger changes and apps with lots of screens, using the "Replace Screens" function is the best way to go. It allows
Single or Multi-Screen Replace
Overall Steps
THIS FUNCTION FULLY OVERWRITES DATA FROM ONE SCREEN TO ANOTHER
- Duplicate screens that need changes or the whole app
- Edit DUPLICATES in the original app, or ORIGINALS in the duplicate app
- Replace any number of screens within the same app, or between apps
Replacement Process
1) Open screens section in Constructor. Find screen IDs that will participate in replacing process - marked blue ↓.
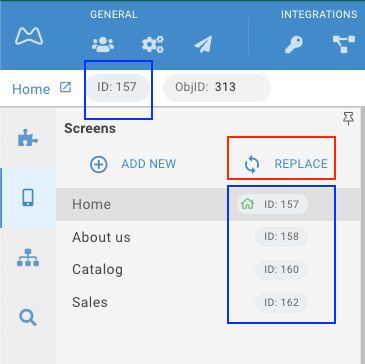
Press the "REPLACE" button - marked red ↑.
2) Fill in screen IDs pairs, marked red ↓, FROM → TO. You can clear fields, delete pairs and Add new pairs.
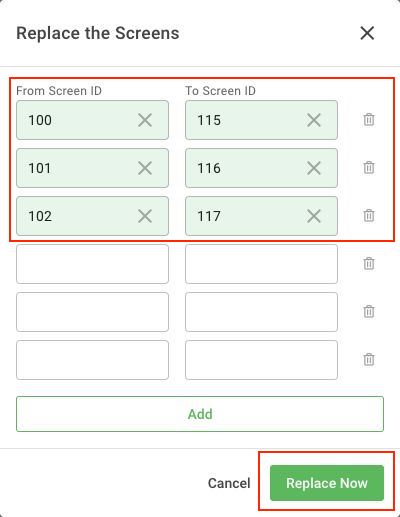
In this example, ID pairs are close to each other in numbers, which means these are probably from the same app.
If all pairs can be auto replaced the fields are filled in green and the "Replace Now" button, marked red ↑, is active.
The process happens almost instantly for all the screens that you need to deploy.
3) IF one of the pairs is filled red, as shown in red ↓, that probably means the screen is replaced from another app on your account, which is OK, with certain condictions.
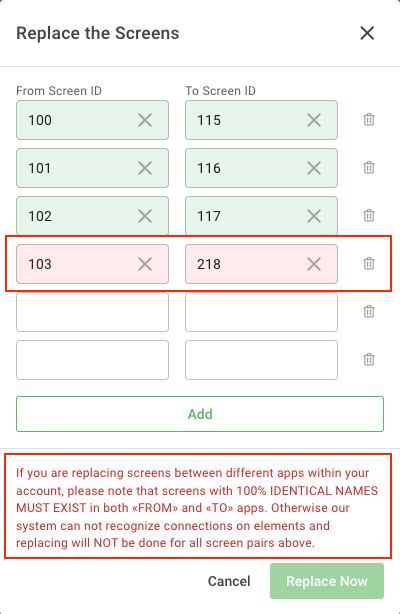
The "Replace Now" button is NOT active in this case and you see the message, explaining how to fix the issue. You just need to have identical & unique screen Names in both apps.
The reason behind this error is the following - all screen IDs are consecutive within your account. So when you Duplicate the whole APP and use this new duplicate app to develop and deploy changes, ALL screen IDs in the new app will be different from the original, so all GoTo and other functions in a duplicate app are rewired with new screen IDs for it to work independently of the original.
The way Replace function works - it checks for screen names to match before executing the Replace. So if you are deploying screens from a duplicate app make sure you did not change screen names and that names are uniqe, as only names are used in re-wiring all screen's internals.
Falling Back to Original
NOTE that copies of replaced screens are created automatically every time for all replaced screens. You will see those _TMP names in the Screens panel. Use these copies to fall back to their content the same way you replaced them. Just delete these extra copies manually, when you don't need them anymore.
Adding New Screens in Original App
This process is fairly simple if you use the same original app. Just Add it, develop it and connect it into your app.
When you use a second/duplicate app to develop and test:
- create the new screen and name it identically in both apps
- develop only in one app and keep the other one empty
- use the Replace function when needed, but make sure you also replace all other screens which have the connection to the new screen
Recommended Preparations
You can choose whatever way of deployment fit your needs, however fo for easier testing and developing updates we recommend:
A) Use the same application to develop new screens, whenever possible.
B) Test your app as a whole, not separate screens, just like your users will do. For that add a condition on a Goto action, so that only certain users will be redirected to the newly developed or updated screen:
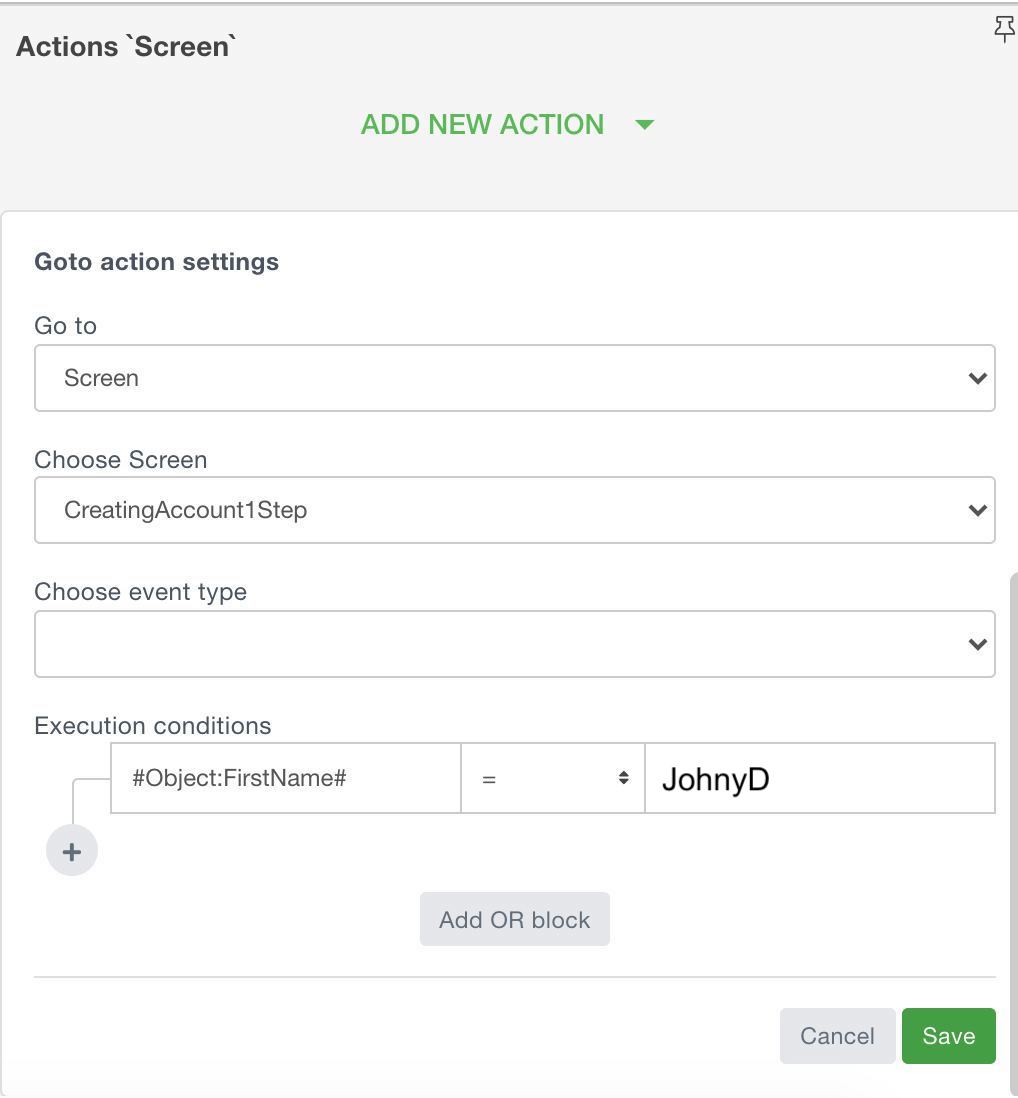
Option 1 - recommended, as simplest to follow. On the RECEIVING SCREEN's Actions panel, add the Goto Condition that will use any of the object's data, in the example below ONLY users named JohnyD, will be redirected to another screen - where changes are made. All other users will proceed using the same screen as before. After you deploy the changes into the receiving screen, this condition will disappear by itself, as it will be overwritten from the SENDING SCREEN.
Option 2. You can add a second action on the element which needs to lead to a screen where you do all the development work. So there will be two actions, say on a Button, as on the example ↓:
First action has the condition to see if an Object's field TestRole is set to 1, and if a user/object with TestRole = 1 presses the button - he will be sent to a screen called Profile-test, which in this case is under development.
However for all other users the second action "Go to: Profile" will kick in and they will keep using the app as usual.
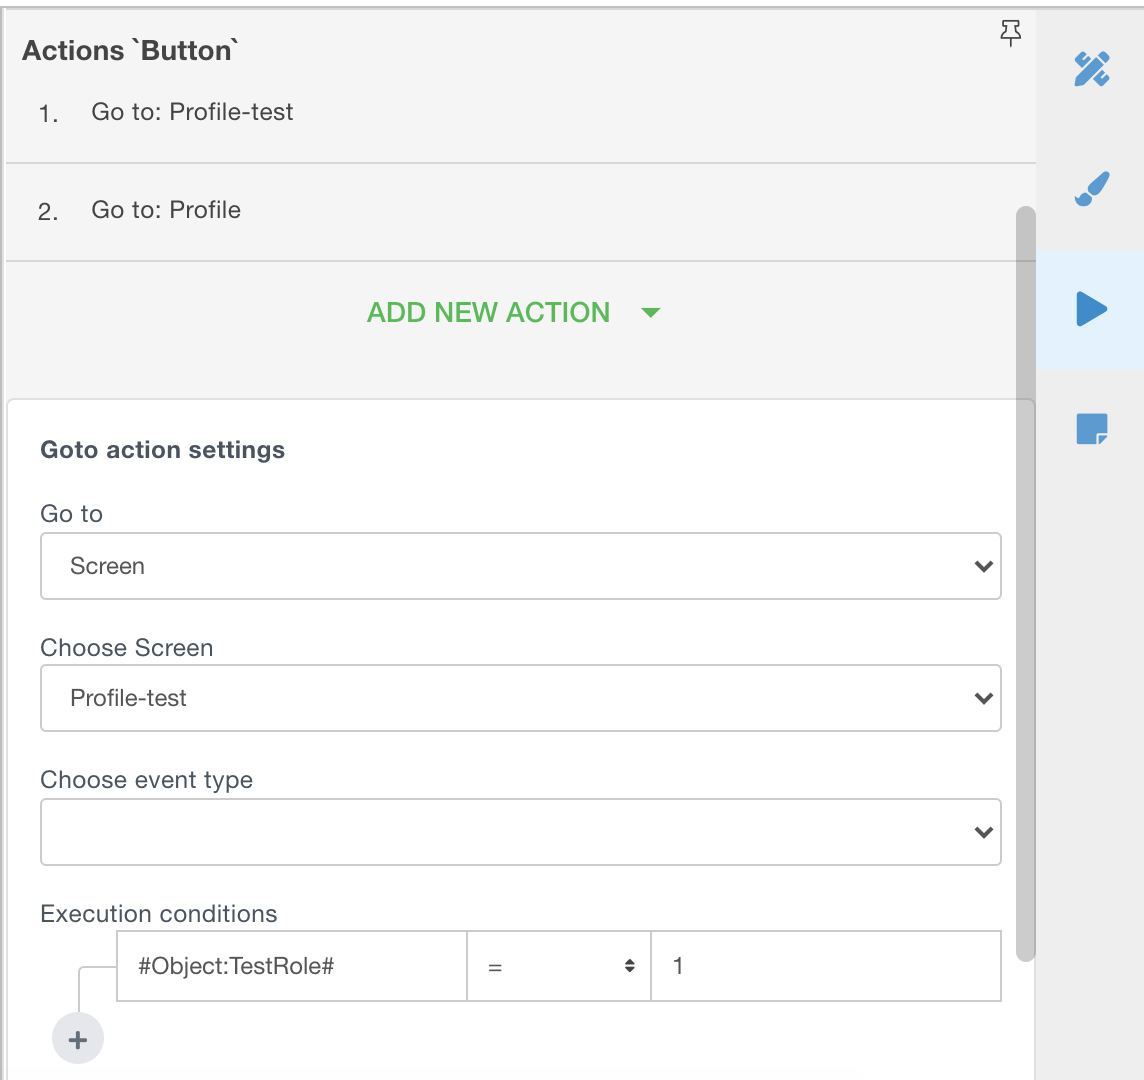
In this case you might want to come back to delete this extra condition after development work is finished.