This article explains how to manage Objects.
What is Objects:
Object is a unique user stored on backend. Tenant account can have several apps. Each app can access its' own user records (Objects) within the Constructor and other Objects through API. The data for each Object is stored as a separate row in the table. The columns of the table represent Object's properties and can be customized.
For example, an app user fills in Nickname, Phone and Email fields and submits the form:
In Objects section of the platform Nickname, Phone and Email columns display the data entered by this app user.
You can refer to Objects table data in any part of the platform by using Hashtags.
Objects can be anything the app is built for. For example, it can be a property within a building, or a machine at the factory. Example: each printer in Mobsted office has unique QR code on it. When the printer is out of paper, an employe scans QR code and submits the task for the service in the app. On the backend Printer Object gets the marker for the paper in.
Manage Objects:
WHERE TO FIND APP USERS & OBJECTS
To go to Objects section, you can:
If you already entered your app: header → App Data → Objects
If you just logged in and see apps list: App's MENU → Objects.
APP USERS & OBJECTS VIEW
View of Objects section on Mobsted multichannel pwa platform where application users are represented as separate record and are called Objects
The platform has a number of pre-built data columns:
ID: unique CONSECUTIVE ID of the object, is used to reference the object and it's properties
Enabled: allows to turn off the access to the app for the app user, is checked ON by default
LoginUrl: link with QR code and link to access the app. Can be used for testing and distribution purposes. The app can be launched in desktop browser on behalf of the user.
PIN: access password to enter when opening the app
LastLogin: displays the date and time of the last access. If blank - the user has not accessed the app yet
HomeScreen: you can choose the screen app user will see first. Set to Home by default
Email
Phone
LastModified
CreateDate
Facebook Channel / Telegram Channel / Viber Channel / VK Channel / Chrome Push Channel: indicates which notification channels are enabled for the user
Timezone
Tester: app user which is used for testing. Objects checked as testers are displayed in Preview mode in Constructor, you can select the object and see how the screen is displayed for this user.
- extID: used to store an external user id for the web site to pwa converter tool
- UUID: the second unique and "scrambled" ID of a user in alphanumeric format - 16 random symbols 0-9, a-z, A-Z
Most system columns exist in a table by default. Some you can add, depending on a use case. This columns are Email, Phone and PIN:
CUSTOM COLUMNS - ADD ADDITIONAL PARAMETERS TO USER TABLE
Adding custom column on Mobsted PWA multichannel platform and filling in Object fields
Parameters to fill in:
Column name
Default Value: optional to fill in. When filled in, this value will automatically apply to both exsisting and new objects
Column will contain files (ONLY): restricts the column to store anything but files (Photos, Videos, Audio). When not checked a column can store both files and data i.e strings, integers.The size limitation is 50MB.
Add Objects:
You can add Objects to the platform manually, via CSV or Excel import or using API:
ADD MANUALLY :
On Home Screen of the platform click Create New Application
Fill in it's name and click Next
Navigate to Objects section
4. Click Add Custom Column, name it as Name and click Save Column
5. Add Email and Phone columns by clicking Add Primary Email and Add Primary Phone buttons. Add Custom columns if needed.
6. Clicking Add Object button will add new object to the end of the list. Fill in table fileds.
ADD OBJECT VIA CSV or EXCEL IMPORT:
Please note that when importing Objects in CSV file the columns must be pre-created and delimited with semicolon otherwise, the import will not work.
click Import
select CSV or Excel file (MAX file size is 5MB)
select the column of the objects where the column from the file will be imported:
Demo CSV File with some columns pre-created:
ADD VIA API
Read on the API section of the Docs
Set Up Objects Table View:
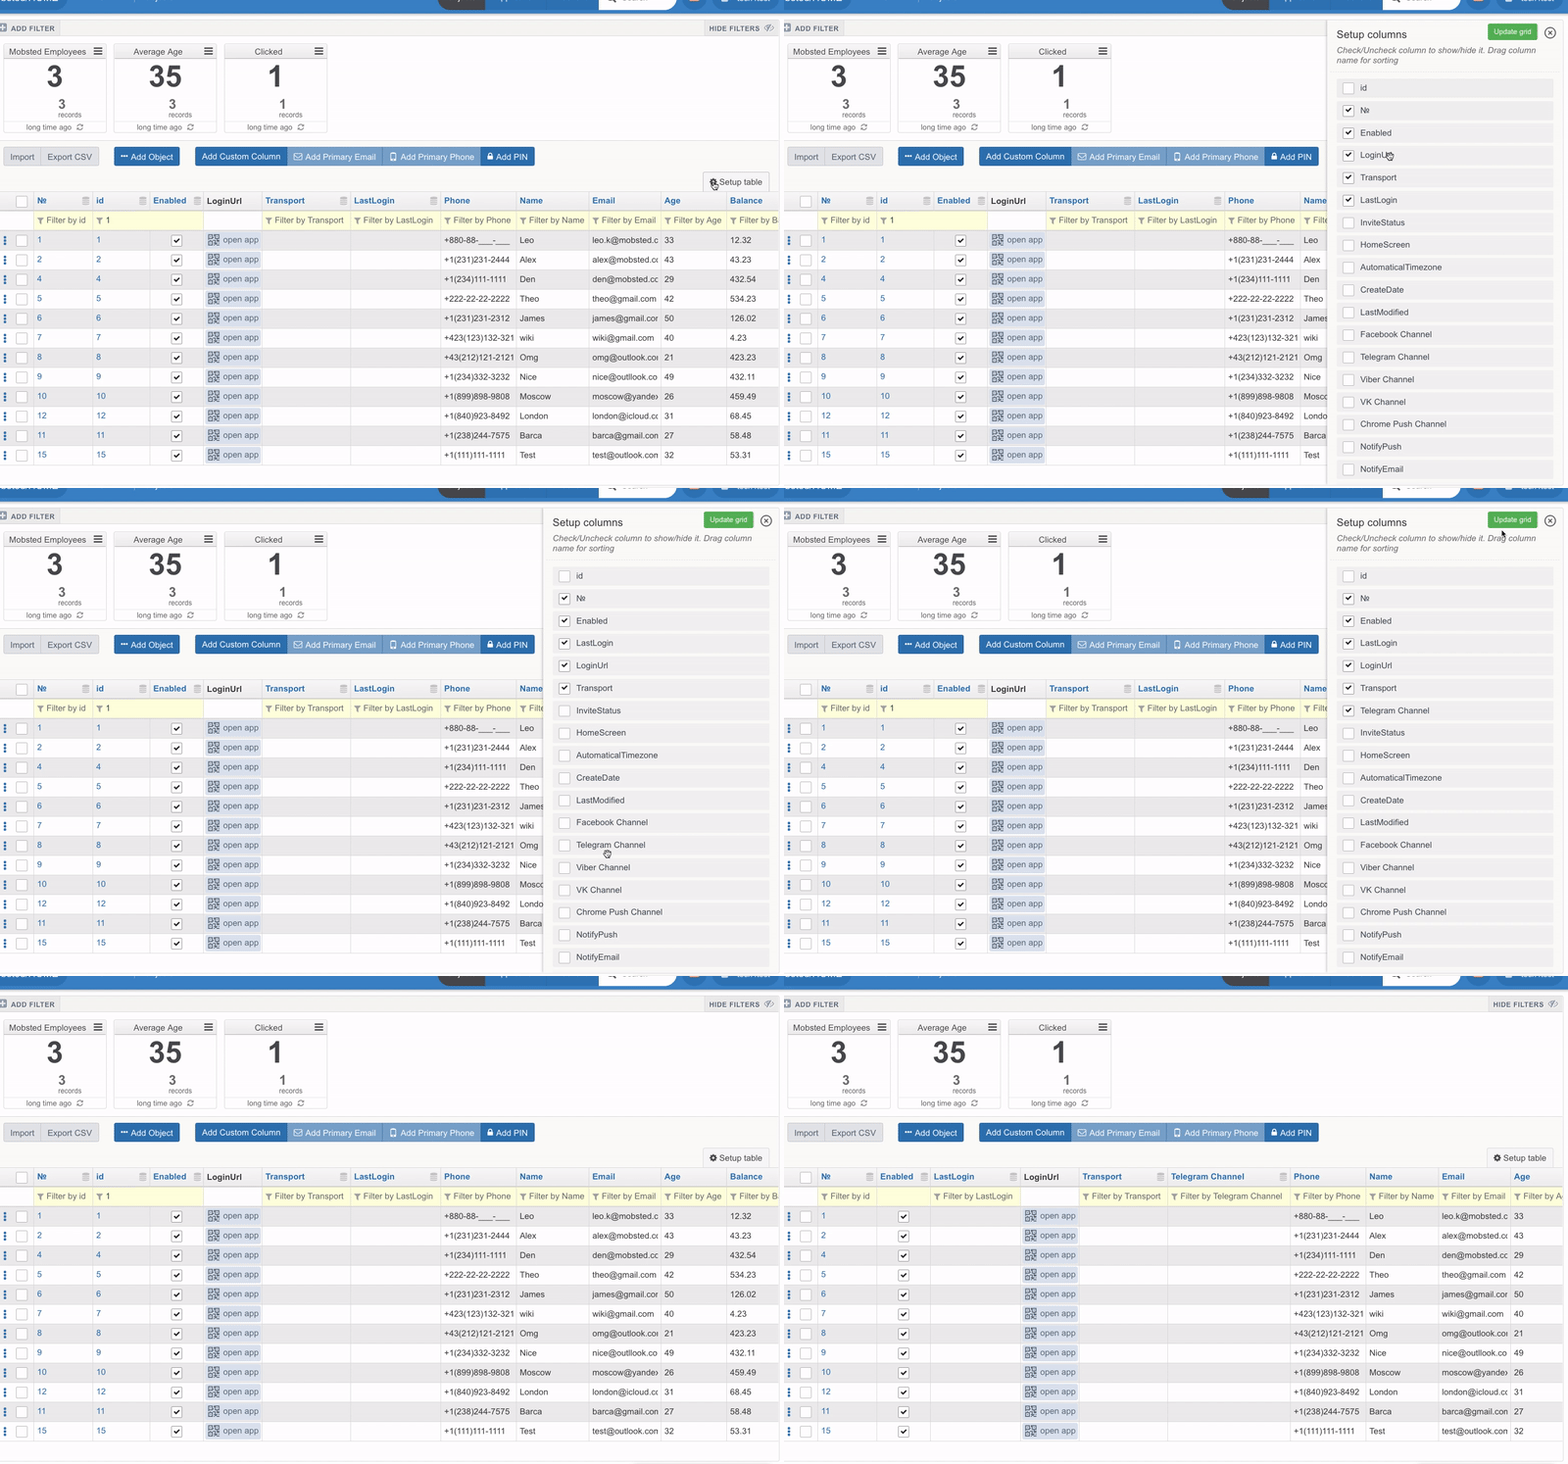
Choose the columns you want to be displayed on your screen:
click Setup table button on the right
select the columns to be shown
drag and drop columns set up the order you need
click Update grid.
Other important Actions with Objects:
MANUAL FILTERING
OBJECT ACTIONS
Click menu of ONE object, or Select several to perform actions with all:
AUTOMATIC FILTERING
Read on Creating Filters
API CRUD OPERATIONS
Read on API section

