...
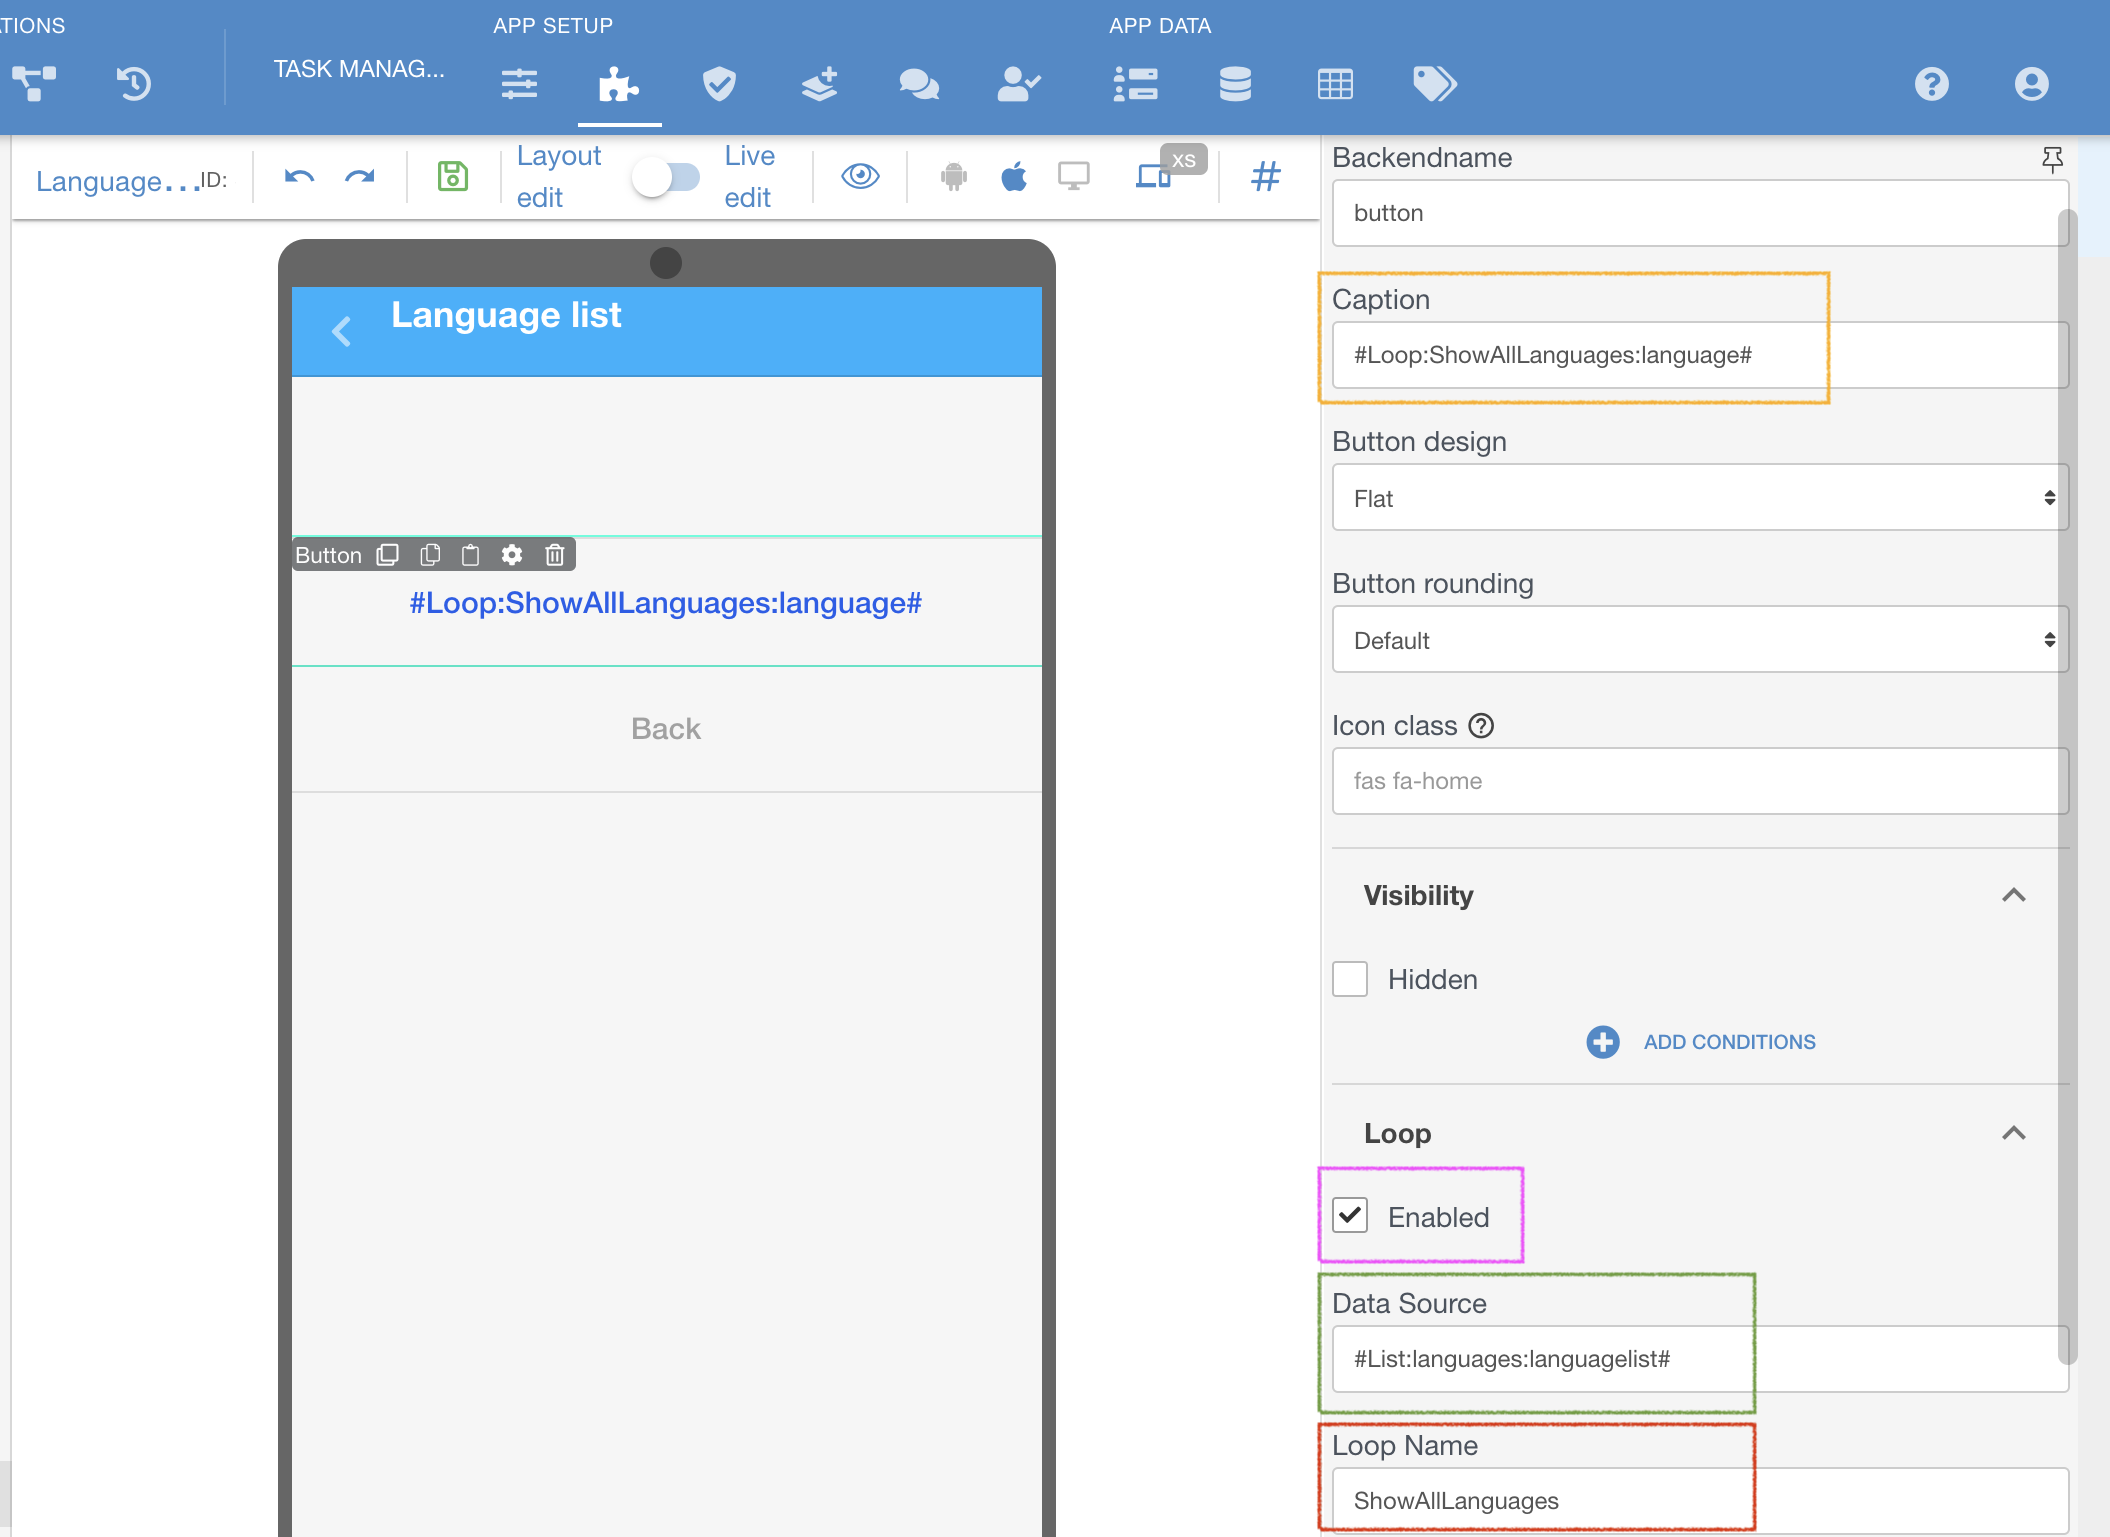
A button added to a screen
Enable Loop on the button, marked purple ↓
Insert a hashtag with the List you want to use as Data Source, marked green ↓, as example, #List:languages:languagelist#, where:
List = a command to address lists of tables in hashtag
languages = a name of a list we have in this sample app
languagelist = a name of the actual table you are referring to
Name the Loop, as how it can be referred later on, marked red ↓, for example - ShowAllLanguages
Refer to this named Loop in any place of a button, in this case in Caption section - #Loop:ShowAllLanguages:language# , where:
Loop = a command to show that some data needs to be pulled from the Loop
ShowAllLangues = a name of the loop we have given before
language = an exact column name, which you are pulling from the list and need to iterate.
| Note |
|---|
There is a reason why there is an extra step, from DECLARING the Loop's source and using it's data on screen in form of a Loop's name. This allows to declare and name more then one data source for the same iteration (inserting row in row and declaring loop on each of them) and refer to the exact needed data point later to show more complex data. |
| Content by Label | ||||||||||||||||||
|---|---|---|---|---|---|---|---|---|---|---|---|---|---|---|---|---|---|---|
|
...